Custom brush tips are great if you want to create something original, you can create your own in, and for use with PhotoPlus. The routine is straight forward and not difficult, but there are quite a few steps to take to get there.
Step 1:
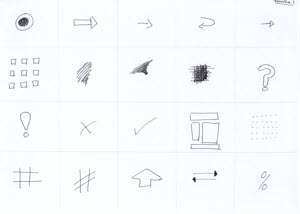
Create something you want to turn into a brush. For this tutorial I’m using some hand drawn doodles scanned in at 300 dpi:
Step 2:
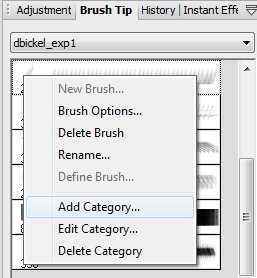 Check that you have your own custom category. Custom Brush Tips can only be saved to categories that you create yourself, not the preset categories of PhotoPlus.
If you don’t have such a custom category then right click inside the Brush Tip Tab window and click on “Add Category …”, give the category a name and click “Ok”. Make sure that your new category is active.
Step 3
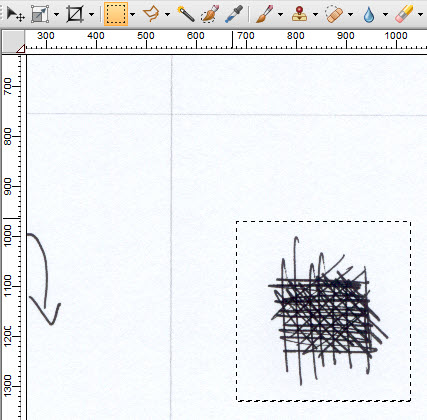
Make a selection of the area you want to turn into a brush by dragging around it with the marquee tool.
If you want to reposition the marquee then, still with the marquee tool selected, place the mouse cursor inside the marquee area and simply drag it to the position you want. Clicking outside the marquee area will deselect your selection, dragging with the pointer tool selected will cut the selection out.
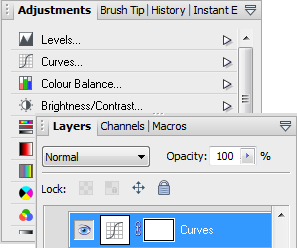
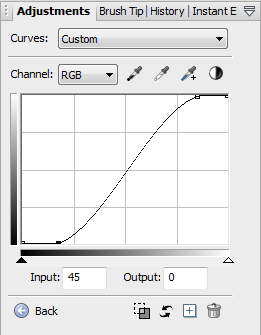
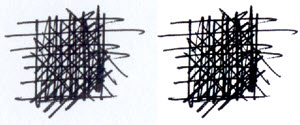
In the scanned doodles, the paper background is a bit “dirty”. To clean this up, I used a curves adjustment layer to enhance the dark/light values of the file to get a nice clean background on the graphic:
To do this, click on “Curves” in the Adjustment Layers Tab and adjust the curve line to whiten the background and to strengthen the black of the doodle.
Step 4
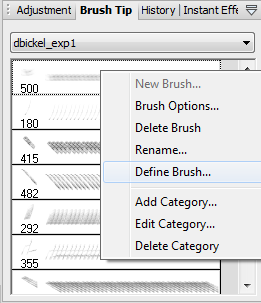 With the Brush Tip tab open, make sure you have your custom category selected where you want to save the brush. Remember: this must be a category that you created yourself – see step 2 – now right click the Brush Tip Tab window and click on “Define Brush…”.
Step 5
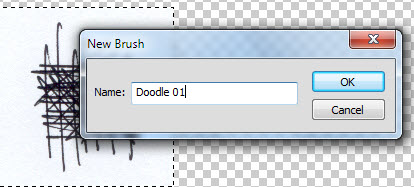
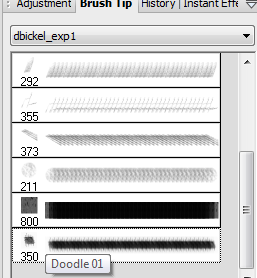
In the pop up dialog give your Brush Tip a name and click “OK”.
Your new Brush Tip will be now appended to any existing ones in the category, on mouse over you can see its name in the Tool Tip.
Tip: To be sure that your new Brush Tip gets saved, swap the category then change back to your new one. This ensures that new brushes really get saved.
That’s it! You have your first Brush Tip.
Things that just happen
I don’t have a Brush Tip Tab!
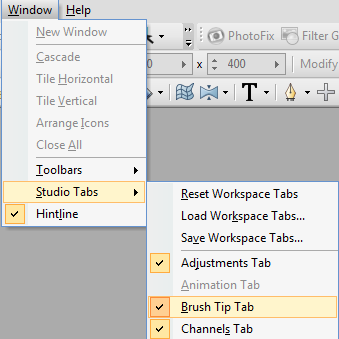
Yes you do, maybe it’s not displayed but it’s there. ;) If you don’t see your Brush Tip tab go to the main program menu and select Window -> Studio Tabs -> Brush Tip Tab to make it visible in your Studio Tabs work space.
I can’t find my new Brush Tip File
Hey, neither could I. This may be because custom tools that you make yourself aren’t stored in the program directory. Maybe they’re sitting in your Windows User files. Different versions of Windows may or may not do this, but the newer versions don’t allow files that are “not-owned-by-the-program” to be saved to the program directory. Try looking in your User files, I found mine under “C:\Users\User name\AppData\Roaming\Serif\PhotoPlus\15\Brush Tips” (where the number – 15 – depends on the version you use).
The Brush Tip files in PhotoPlus are saved with the extension .sbr, and have the same name as the category you created, in this tutorial this was : – dbickel_exp1.sbr
![]()
Nice because, then you can share your Brush Tip file with others, like the ones I share here, or you can be sure you have a back-up, or you can add new Brush Tip files from other people to this folder (you may need to restart then PhotoPlus so that he can find them).
The Doodle drawings that I scanned for this tutorial are also converted into a Brush Tip set and are available to download, you can find them under Doodle Brush Tips for PhotoPlus.



 Create professional websites and online shops without programming:
